The export and import features allow you to effortlessly transfer data to and from your event management software, making your life as an event organizer smoother and more efficient. These functionalities allow event planners to save time, reduce errors, and increase collaboration.
The types of imports and exports available in idloom.events are diverse and can be tailored to the specific needs of event organizers.
Exports:
- Attendee List Export
- Sessions and Options Export
- Hotel Details Export
- Export Templates Creation
- Checkin Export
- Waiting List Export
- Invoices and Credit Notes Export
- Statistics Export
Imports:
- The Two Types of Attendee Import
- Restricted Registration Import
- Attendee List Import
- Rules for an Attendee List Import
- Import Notification Email
Types of Exports:
1. Attendee List Export
Event organizers can easily export attendee lists and related information, such as registration information, ticket types, and form details. This export can be used for various purposes, including sending personalized emails, generating badges, and tracking attendance.
- Begin by carefully selecting the attendees you intend to export.
- The attendees you see in your current list are the ones that will be included in the export file.
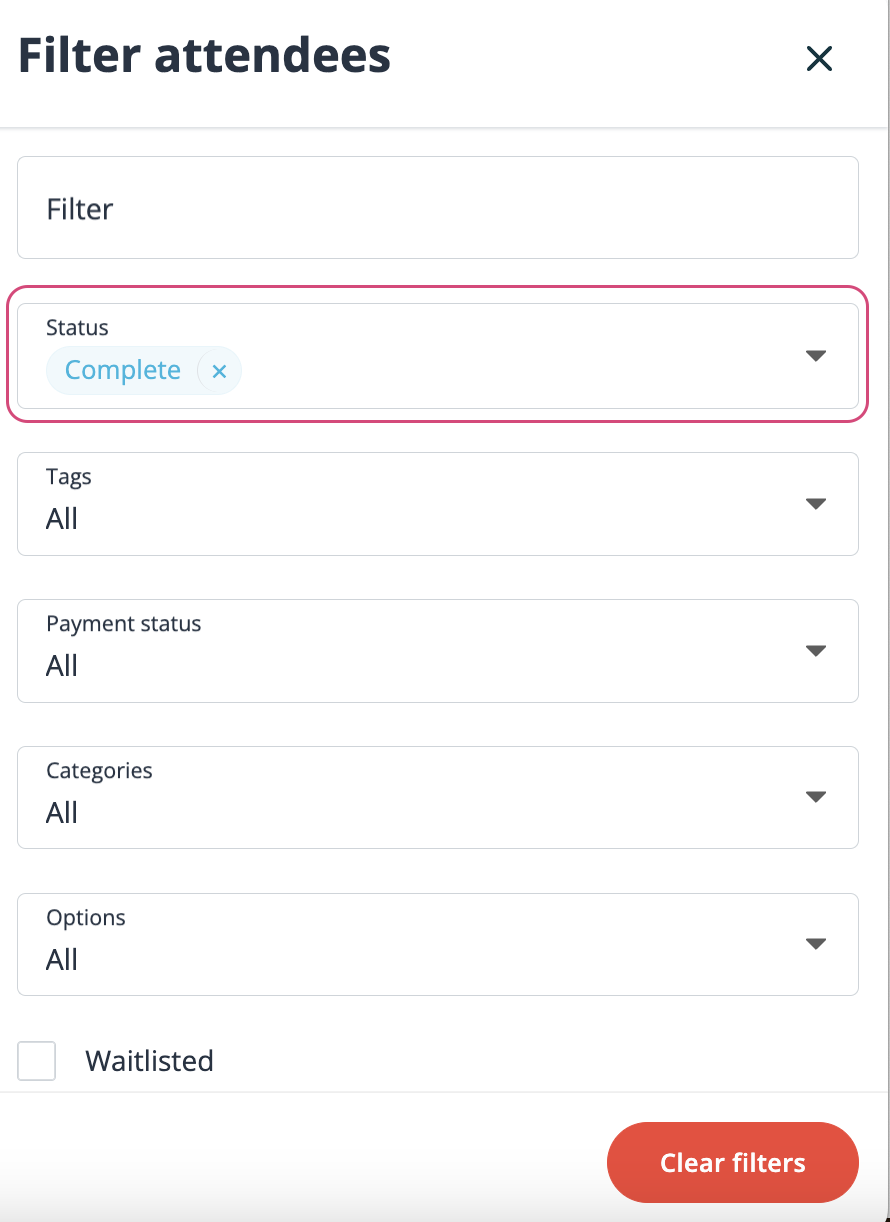
- To refine your selection and filter specific attendees, utilize the convenient filter button.

You have the flexibility to filter attendees based on various factors, including their attendee status, payment status, tags, categories, options, and more.
For example, if you choose to filter attendees on the "complete" status in the Attendee's list, you will only see those attendees with this specific status, and consequently, these are the individuals who will be included in your export file. This level of granularity in filtering ensures that your export precisely matches your event's specific criteria.
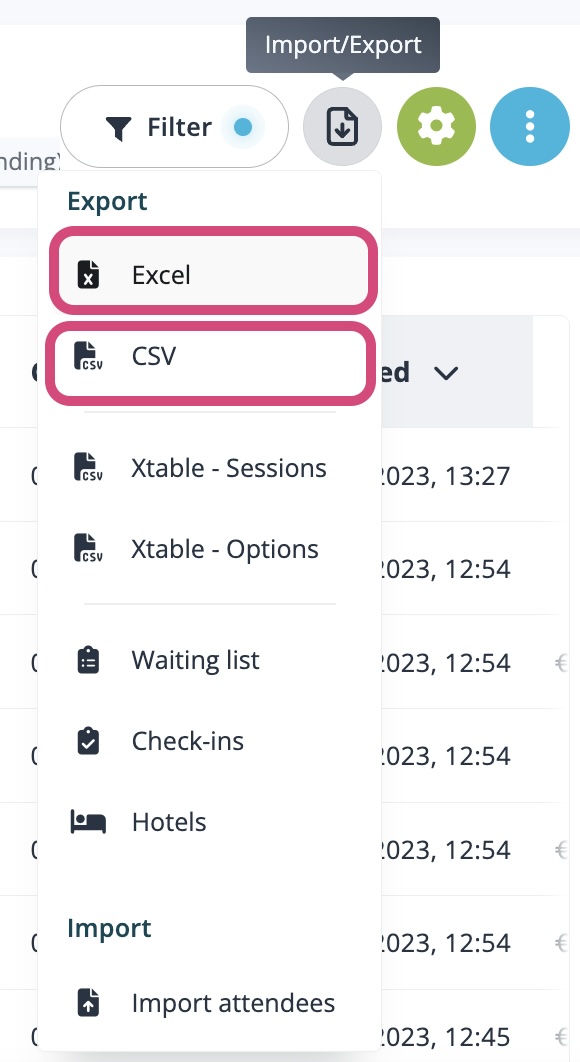
After applying your chosen filters, you're ready to initiate the export process. Begin by clicking on the Export/Import button.

Next, from the list of export options, choose the Excel or the CSV format.
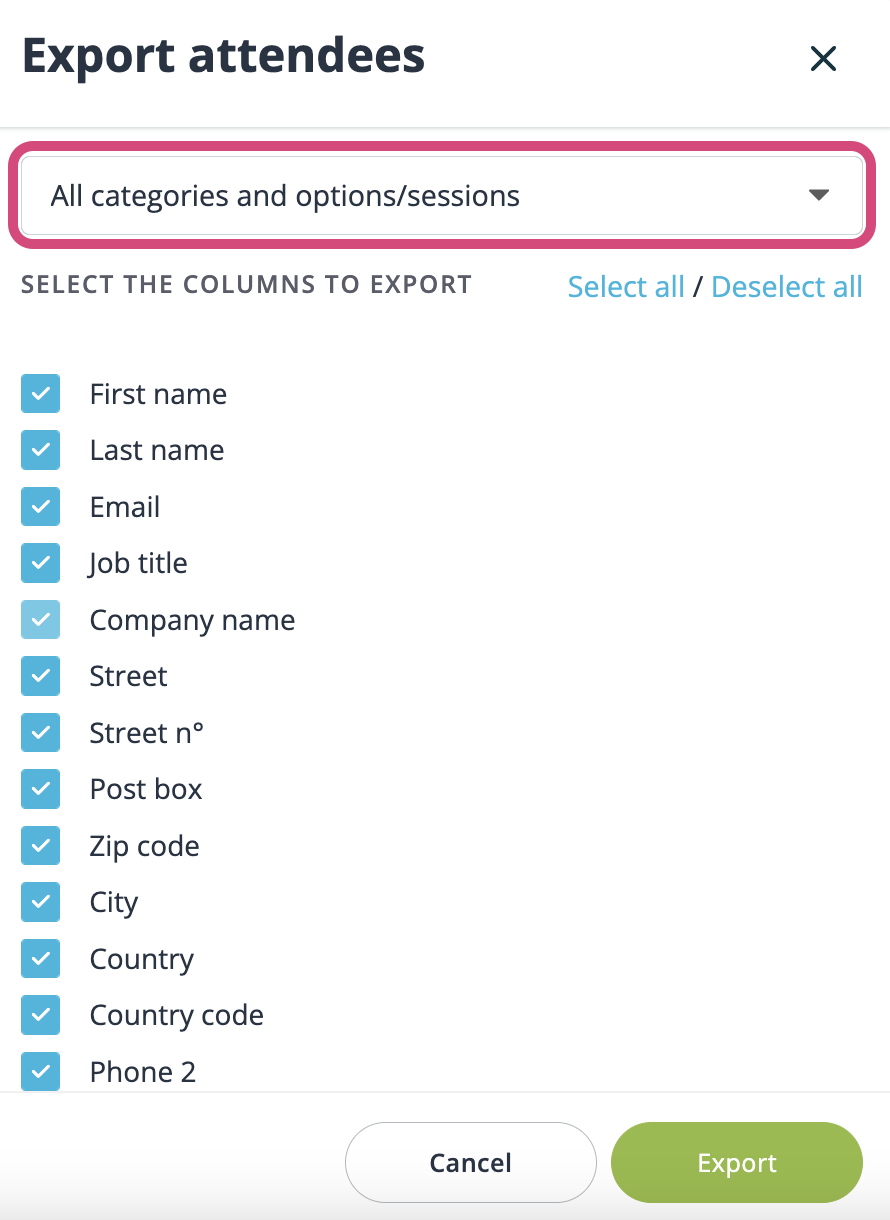
At this stage, you have the flexibility to define the specific categories or options you wish to export. Alternatively, if you want to export the complete attendee list, you can leave the selection on All categories" or "All options/sessions." This allows you to tailor the export to your precise needs or capture a comprehensive overview of your attendee data.
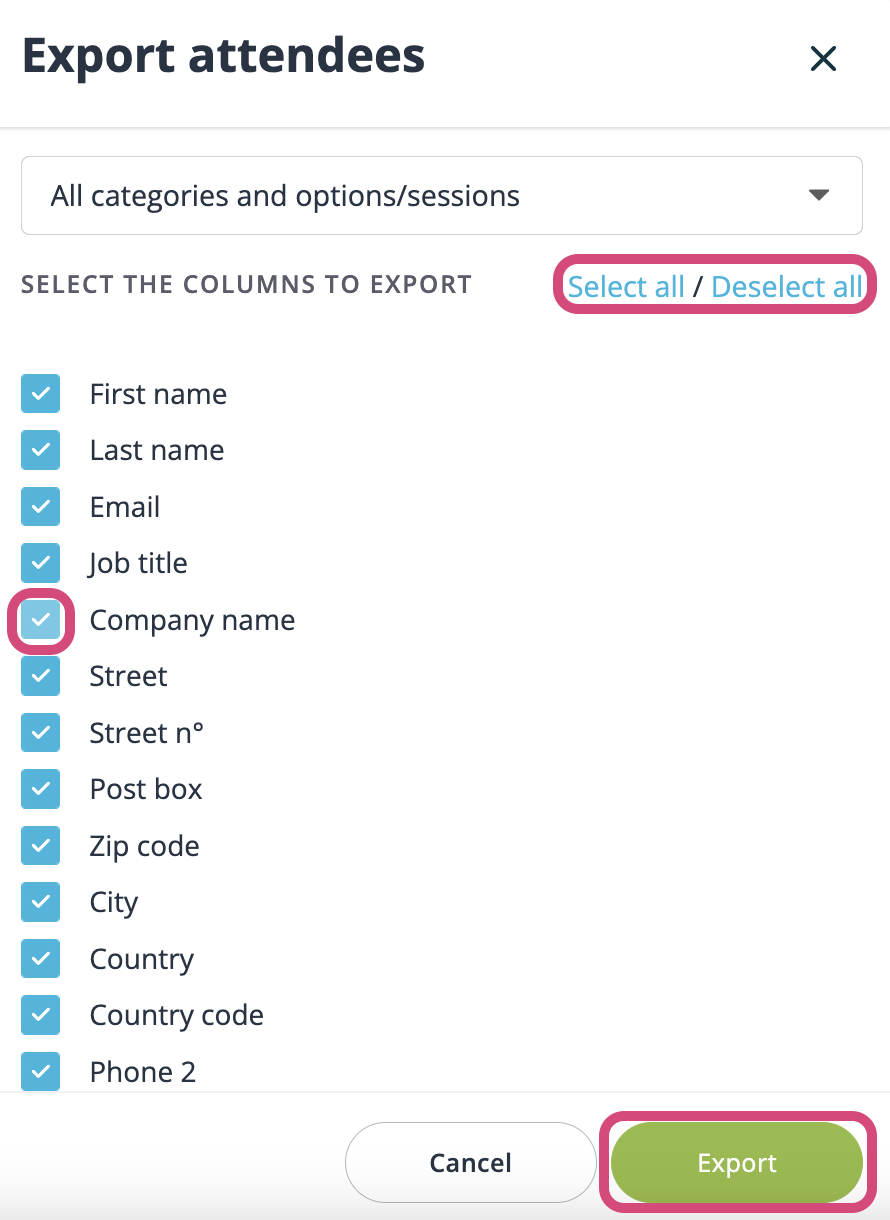
You can exercise complete control over the fields that will be included in your export file. It is possible to manually select or deselect individual fields, or you can swiftly choose to select or deselect all fields using the provided buttons. Once you have made your field selections, simply click on the Export button to initiate the export process.
2. Sessions and Options Export
Exporting sessions and option details in event management software is valuable for data backup, portability, reporting, compliance, customization, stakeholder collaboration, integration, archiving, redundancy, and attendee sharing. It ensures data security, aids analysis, facilitates compliance, and supports seamless event planning and execution.
To be able to export the data form the Sessions and Options, you need to click on the Activate specific dates for categories and options toggle (Tickets > Settings). 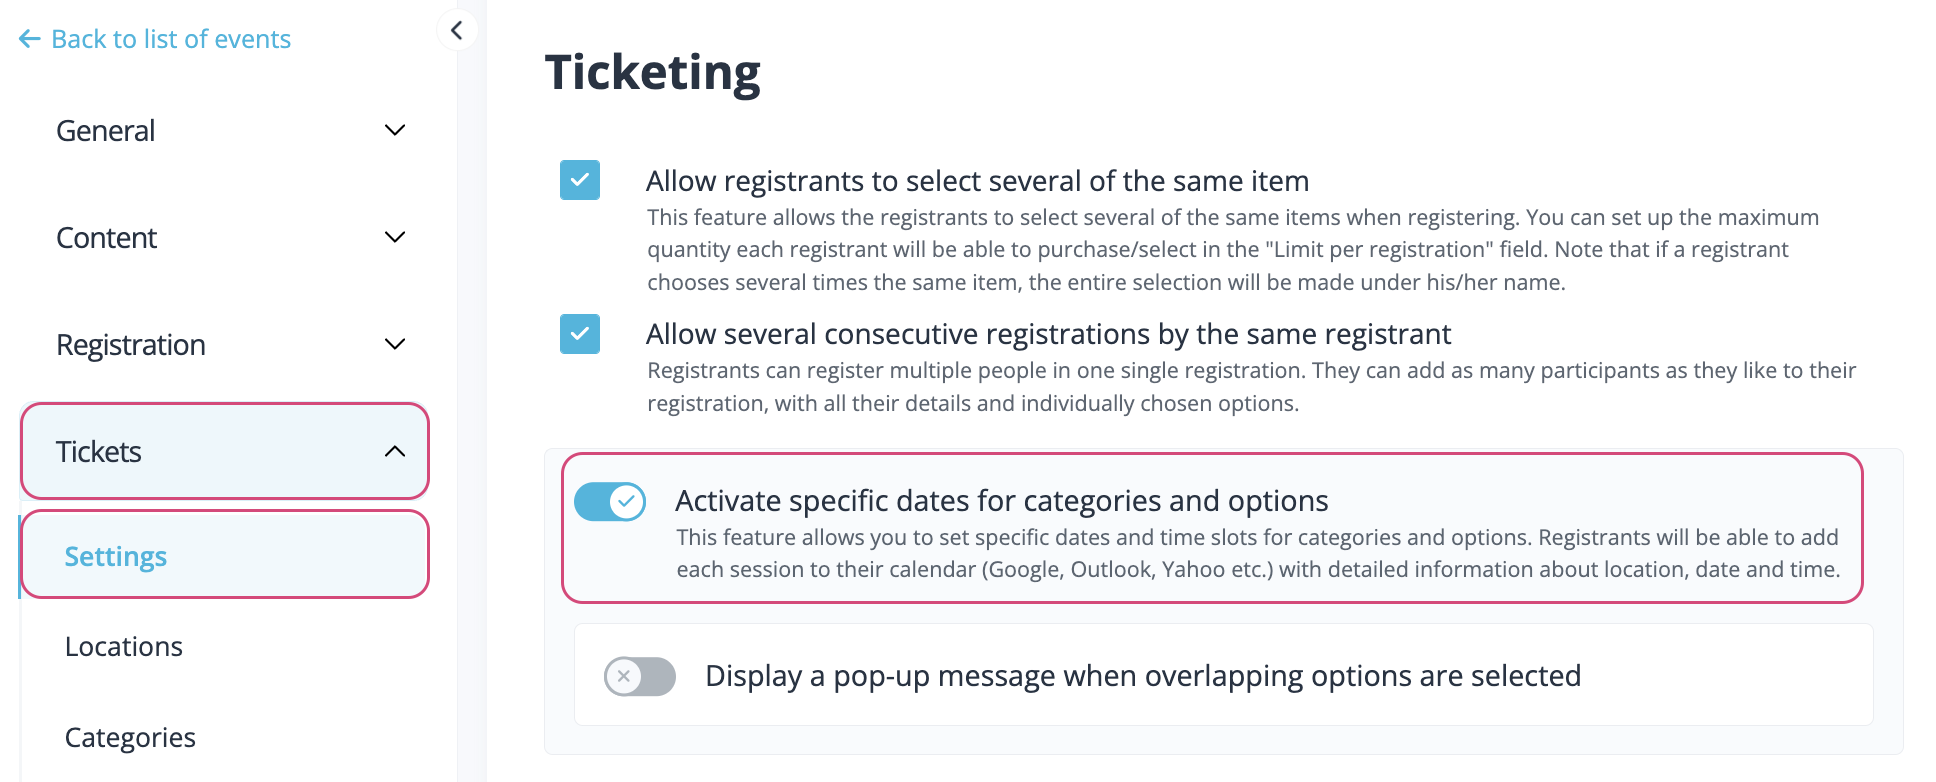
Once activated, you can start adding dates to your options (Tickets > Options).

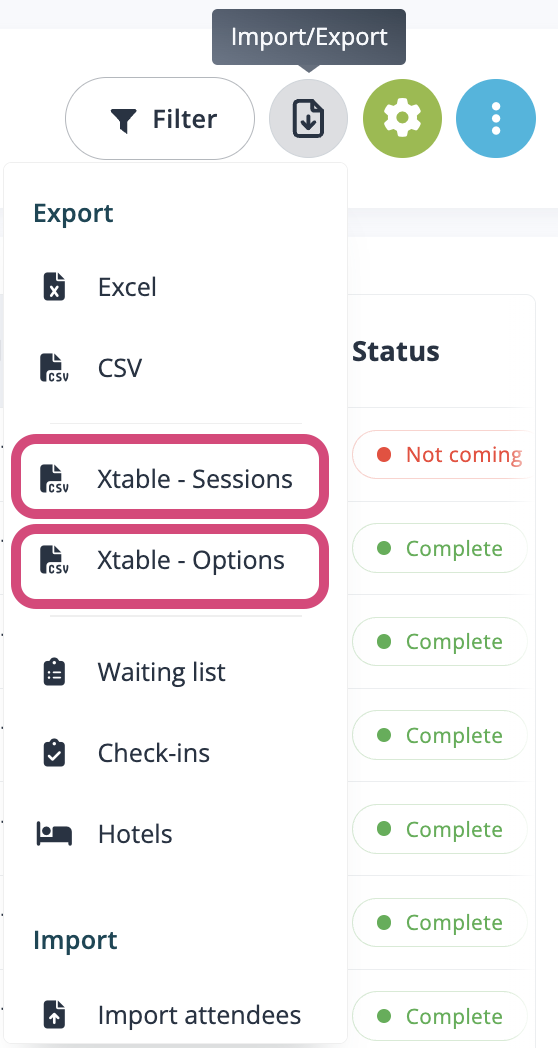
Finally, you can proceed to the export of your Sessions and Options (General > Attendees).
. 
3. Hotel `Details Export
Exporting hotel booking details from your event management software streamlines data management, enhances coordination, and facilitates customization. This export consolidates all necessary information in one file, simplifying the process of booking or allocating hotel rooms.
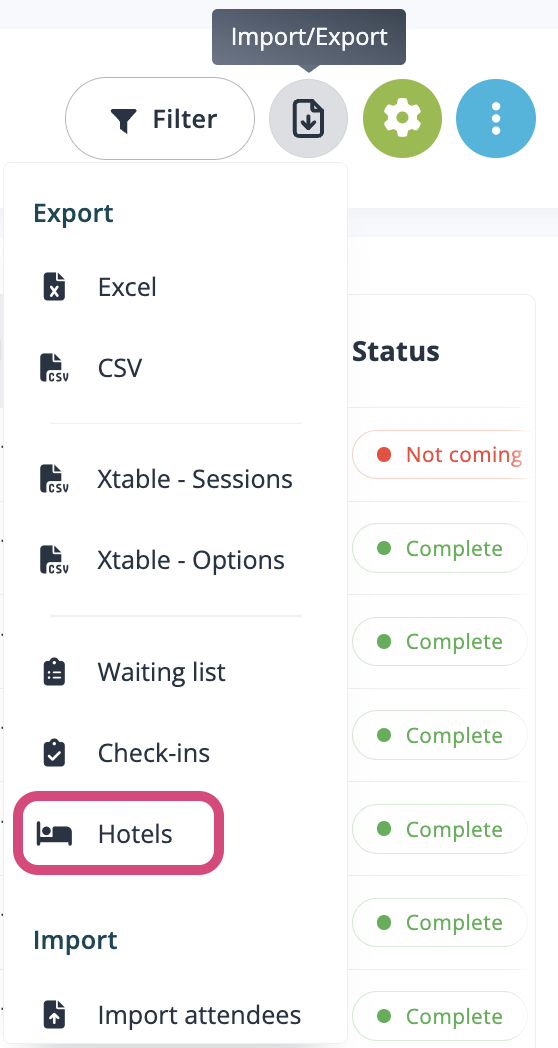
If you've included hotel choices in the dedicated section of your event's registration (Registration > Hotels), it might be useful to you to generate an export that compiles all the essential attendee details linked specifically to this section. To do this, you can utilize our Hotel Export feature (General > Attendees).
4. Export Templates Creation
An export template is useful because it provides a predefined structure and format for exporting data or content, ensuring consistency, efficiency, standardization, error reduction, customization, data transformation, reusability, collaboration, documentation, and workflow streamlining. It simplifies and enhances the export process in various applications and scenarios.
For all the aforementioned export needs, our software offers a convenient solution through customizable export templates.
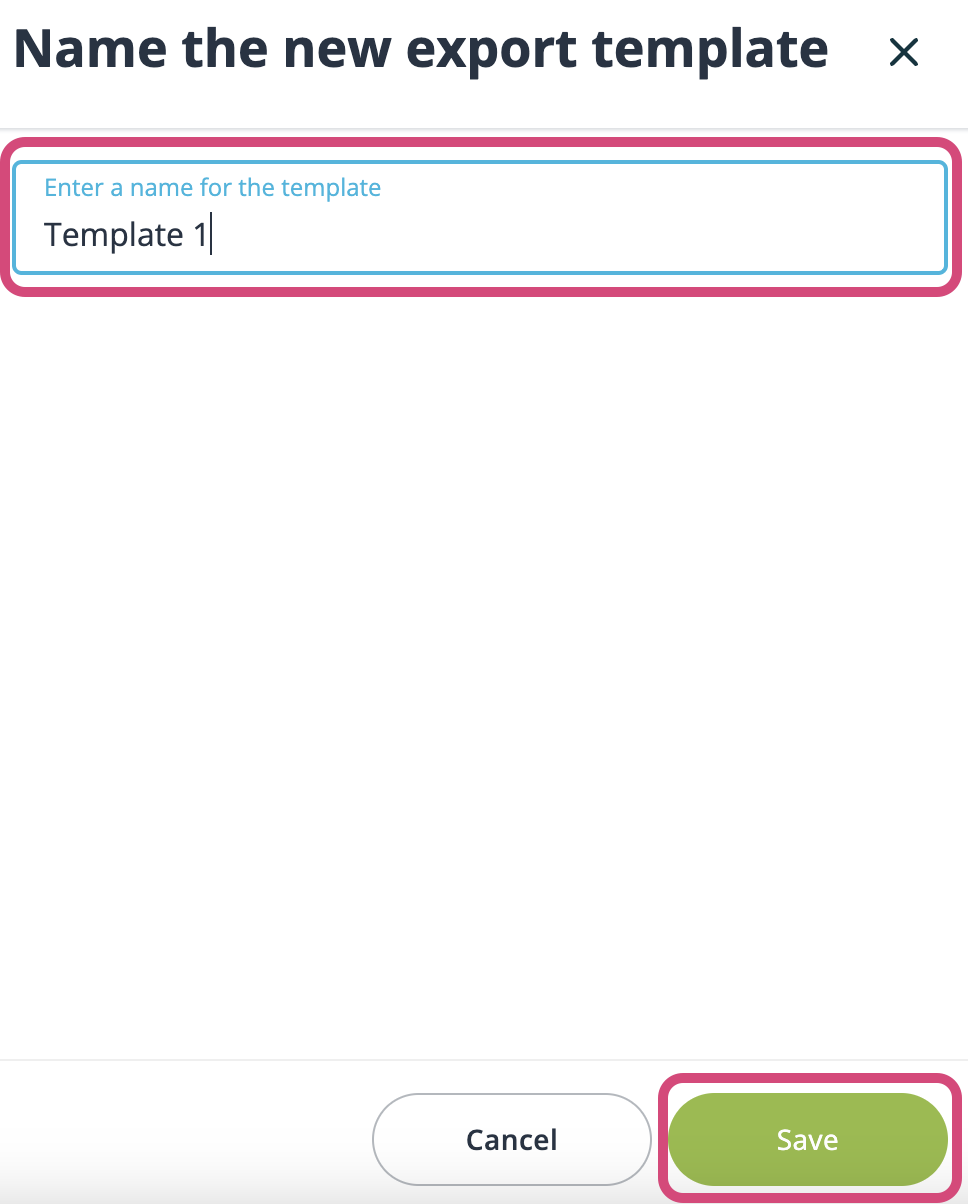
After selecting the desired fields for your export, you can save this configuration as a new template. To do so, simply click on the Save selection as new template button.
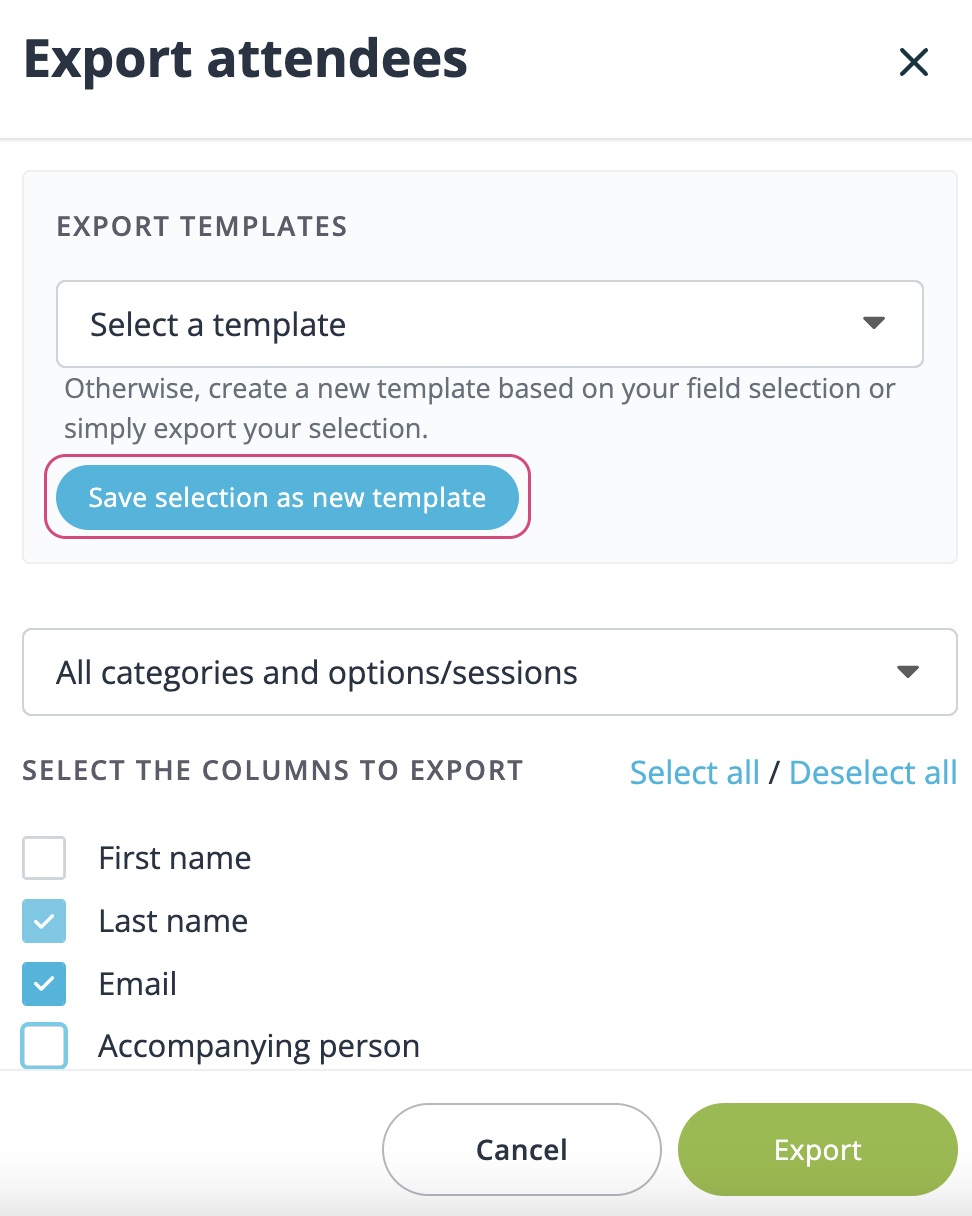
Now, you can enter a name for your template and then save it. This step allows you to easily reference and reuse your custom export settings in the future.
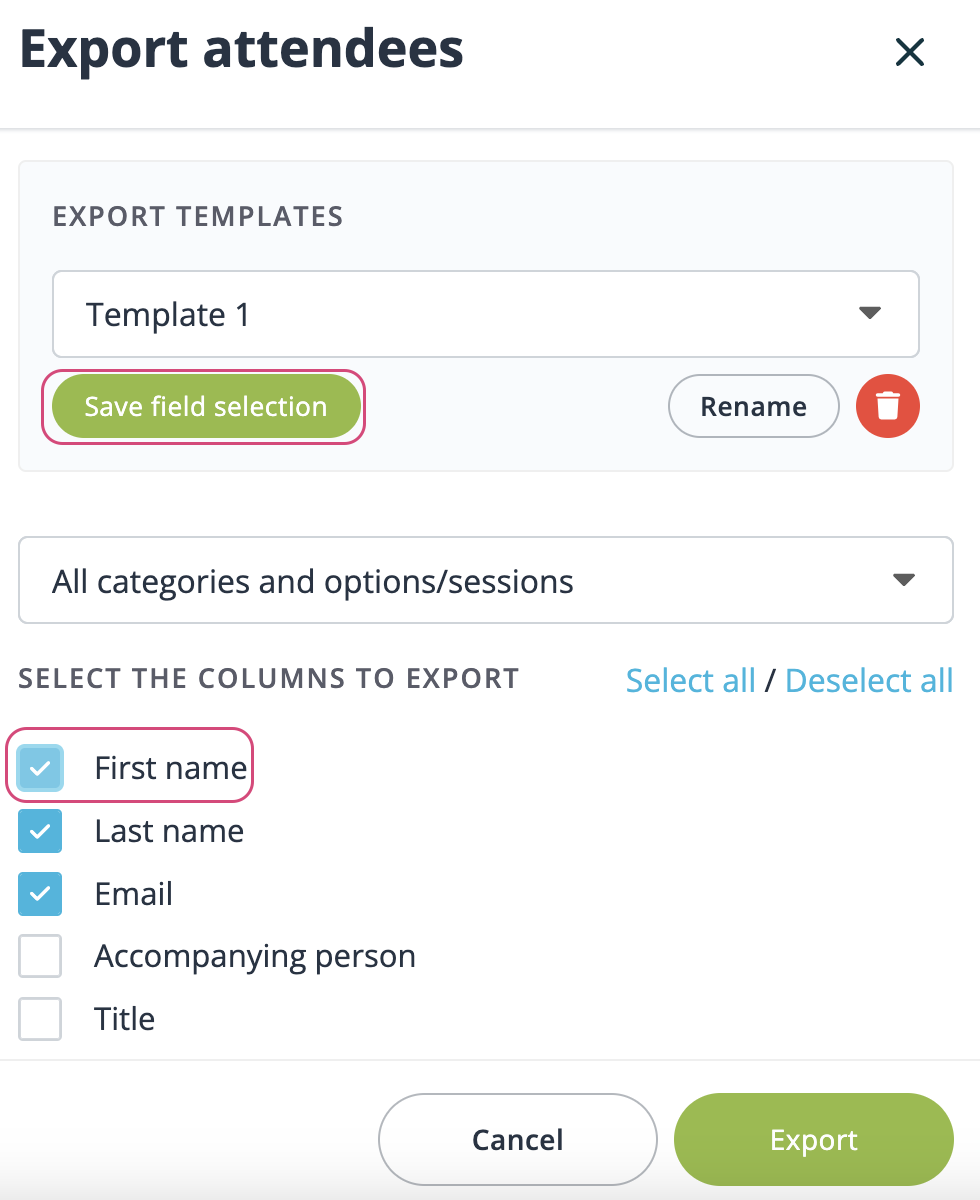
To update your template, follow these steps:
- Select the fields you wish to add or remove from the template.
- After making your selections, click on the Save field selection button.
By doing so, you can modify your template to reflect your evolving export requirements, ensuring it remains a tailored and efficient tool for your needs.
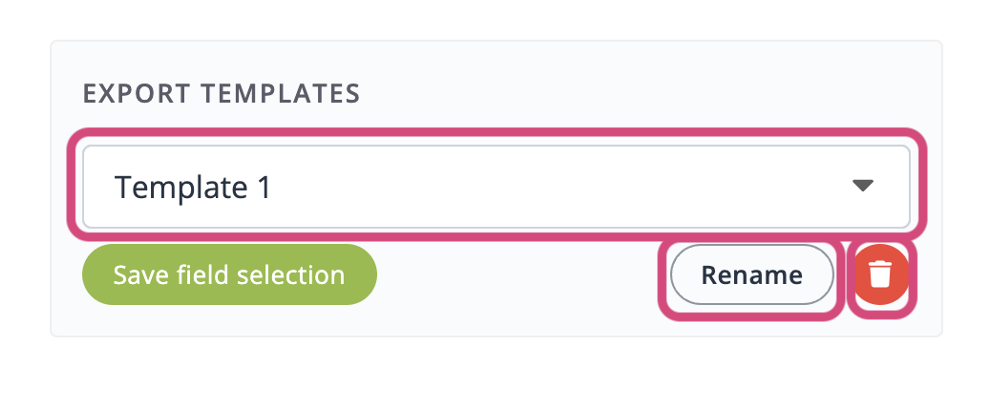
Additionally, you have the flexibility to manage your templates by renaming or deleting them as needed. To do so, follow these steps:
- Select the template you wish to modify.
- Click on the Rename or Delete button to perform the respective action.
This feature enables you to keep your templates organized and up-to-date, ensuring they continue to serve your export needs effectively.
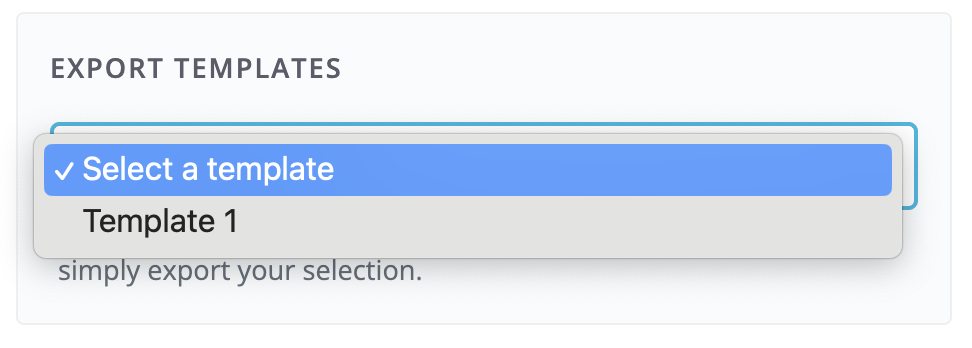
To select a template, click on the drop-down list, and from the options available, choose the desired template that best suits your export requirements. This allows you to quickly access and apply the predefined export configurations you've created.
With your selected template in place, you can proceed to export your data using this template.
It's important to note that templates are shared across all users in the Profile. This means that any template you create or select can be accessed and utilized by all users, promoting consistency and collaboration within your event management software.
5. Checkin Export
Exporting check-in details can be valuable for event organizers as it allows for efficient tracking of attendee arrivals, streamlines the on-site check-in process, enhances security by verifying participant identities, assists with event planning and resource allocation, and provides valuable data for post-event analysis and improvement.
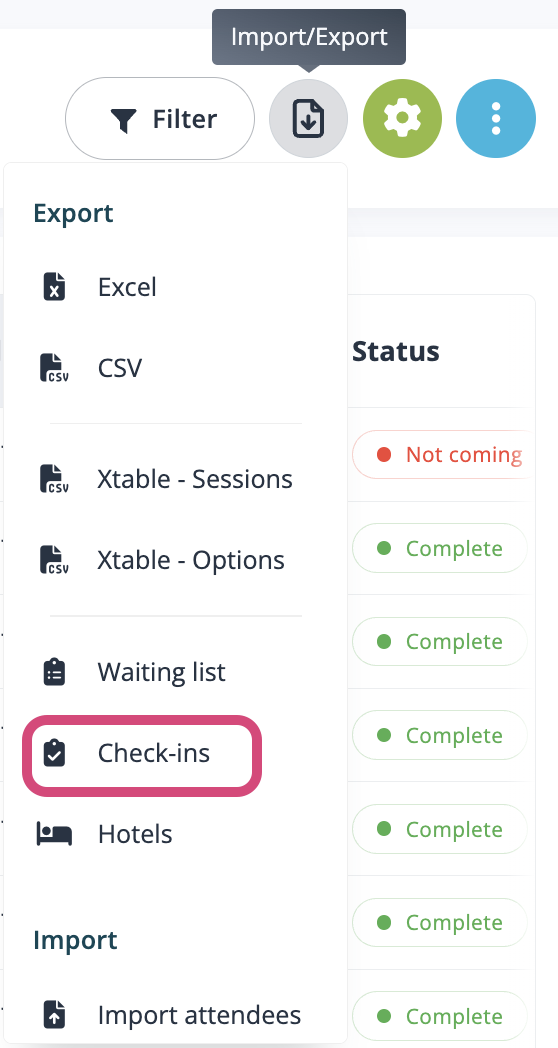
It can be valuable for you to create an export that consolidates all check-in details associated with this specific section. You can accomplish this by making use of our Check-in Export feature (General > Attendees).
6. Waiting List Export
Exporting option waiting list details can be beneficial for event organizers as it helps manage attendee preferences, efficiently allocate limited resources, enhance attendee satisfaction by accommodating their choices, and provides valuable data for understanding demand and optimizing future event planning.
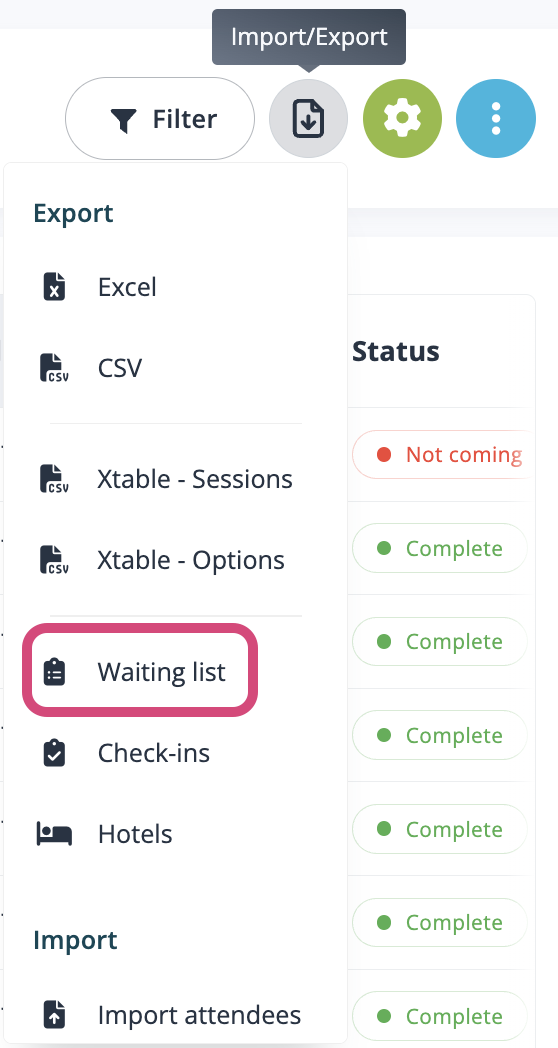
Creating an export that compiles all waiting list details related to this specific section can be highly advantageous. You can achieve this by utilizing our Waiting List Export feature (General > Attendees).
7. Invoices and Credit Notes Export
Exporting financial documents information like invoices and credit notes is crucial for maintaining accurate financial records. This practice, offered by idloom, aids in financial tracking and accounting compliance, supports data analysis and budgeting, enhances financial transparency, and facilitates payment history documentation.
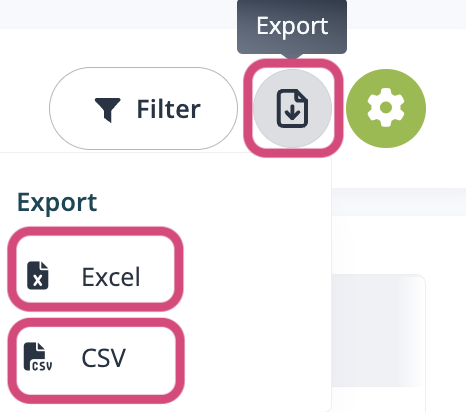
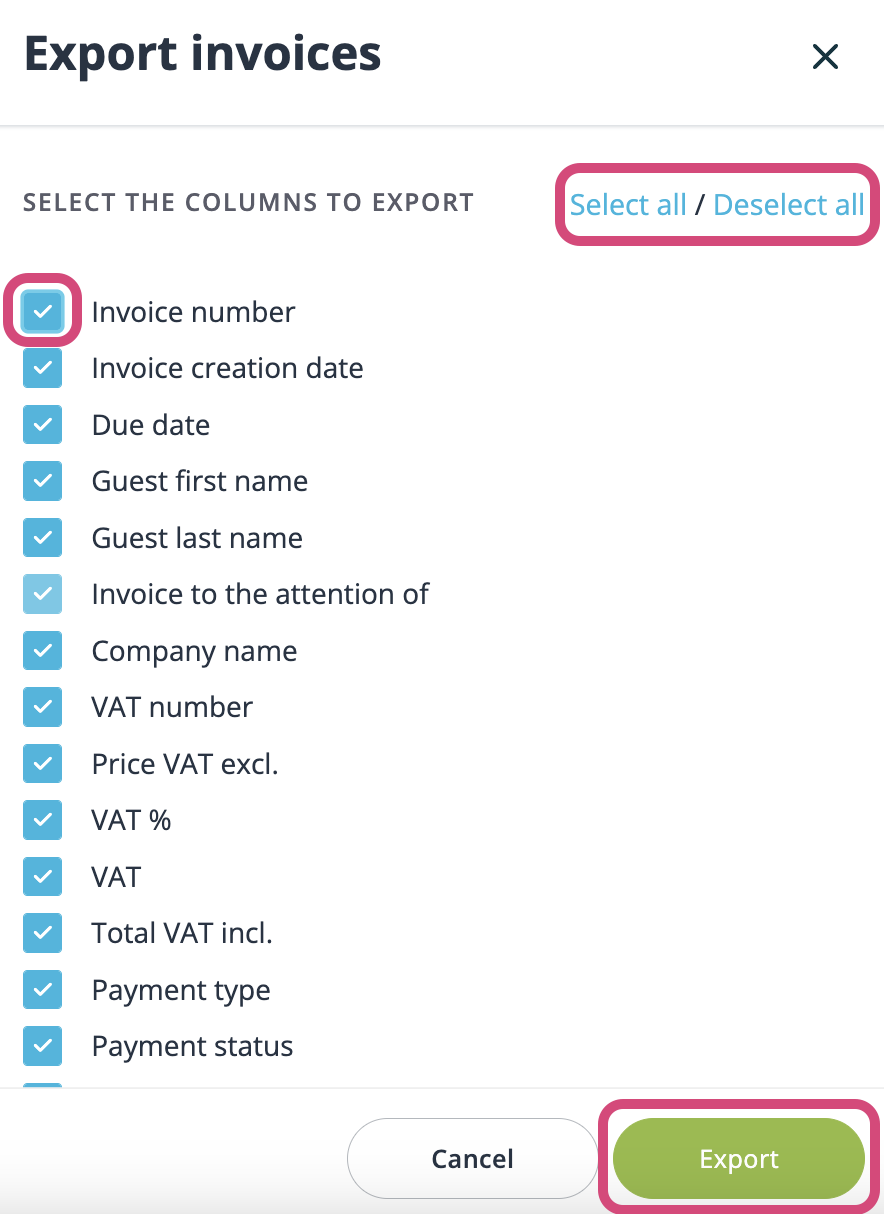
To proceed, navigate to the Money section of your event and to the related sub-section, Invoices or Credit Notes. Then, click on the Export button and select the desired file type (Excel or CSV). You can now pick the selection of fields you would like to export, manually selecting them or bulk selecting/deselecting all the files. Finally, click on the export button to proceed to the export.
8. Statistics Export
idloom provides the ability to export event reports, which include financial summaries, attendance statistics, and more. These reports can be customized to meet specific event analysis needs. Exporting registration data is indispensable for monitoring attendee demographics effectively.
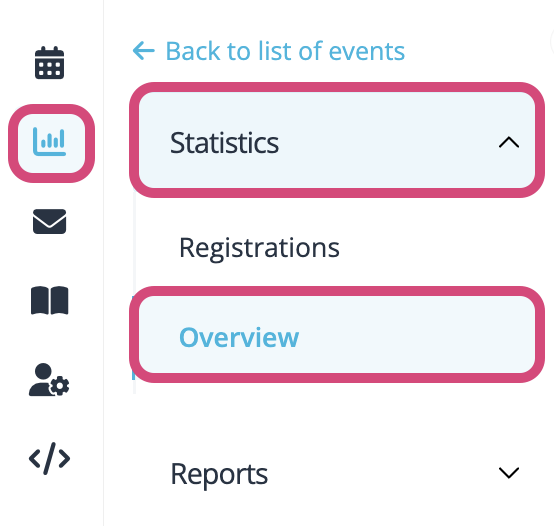
You can initiate these exports Statistics part of your account.
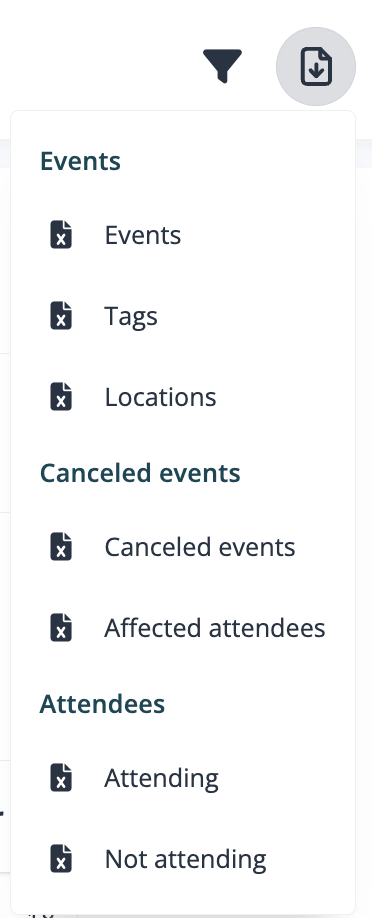
Event Details Export:
- Events: Provides information about the events created within your account.
- Tags: Displays all tags assigned to both events and attendees.
- Locations: Offers statistics regarding the quantity of physical and online events.
Canceled Event Details Export:
- Canceled Events: Presents details of events that have been canceled within your account.
- Affected Attendees: Offers the contact information of attendees affected by the canceled events in your account.
Attendee Details Export:
- Attending: Includes contact details of attendees with "Attending" statuses within your account.
- Not Attending: Encompasses contact details of attendees with "Not Attending" statuses within your account.
Types of Imports
1. The Two Types of Attendee Import
There are two distinct methods for importing attendees: the Restricted Registration Import and the Attendee List Import.
The Restricted Registration Import empowers you to extend invitations to prospective event attendees from your contact list. It enables you to closely manage the imported attendees, send timely reminders, and gain insight into who from your contact list has registered by using individual registration codes.
On the other hand, the Attendee List Import is designed for importing a pre-confirmed list of event participants to whom you need to send confirmation emails exclusively.
2. Restricted Registration Import
Event organizers often need to import contact lists or databases to facilitate communication with potential attendees, sponsors, or partners. idloom offers a convenient way to import and manage these lists.
3. Attendee List Import
idloom allows event organizers to import attendee data effortlessly. This includes information such as names, email addresses, contact details, and any other relevant data. This feature is invaluable for populating attendee lists quickly and accurately.
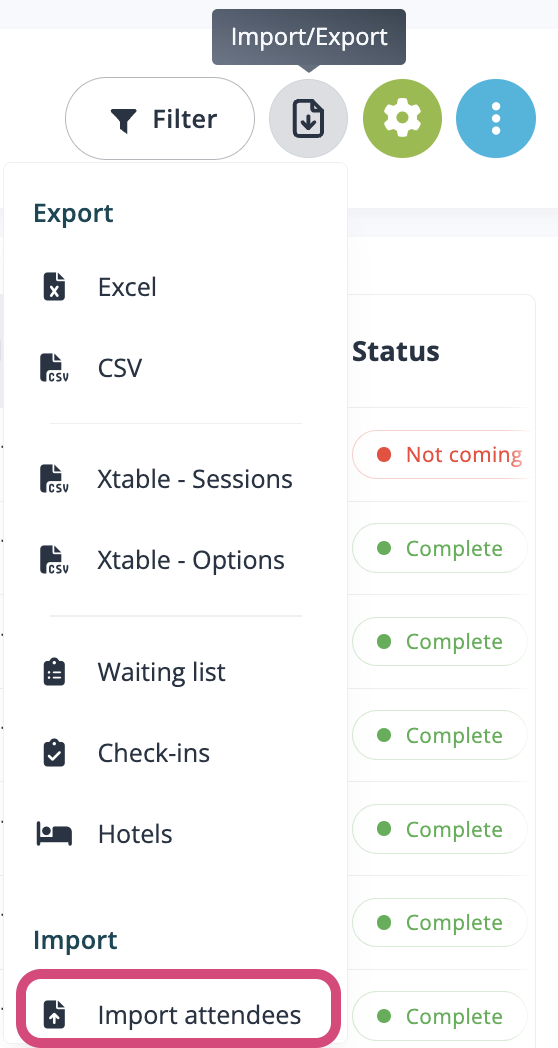
Navigate to the Attendee List (General > Attendees) and click on the Export/Import button, to select the import attendee feature.
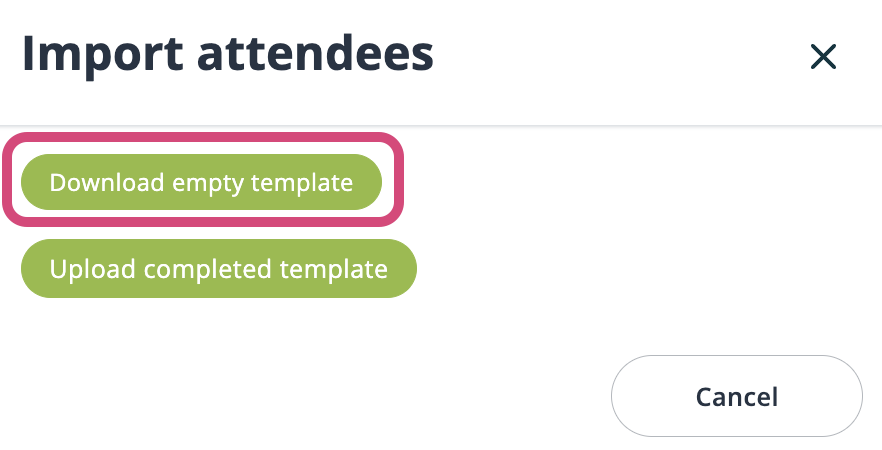
Please follow these steps: download the attendee import template, fill it out, and then upload it in this section.
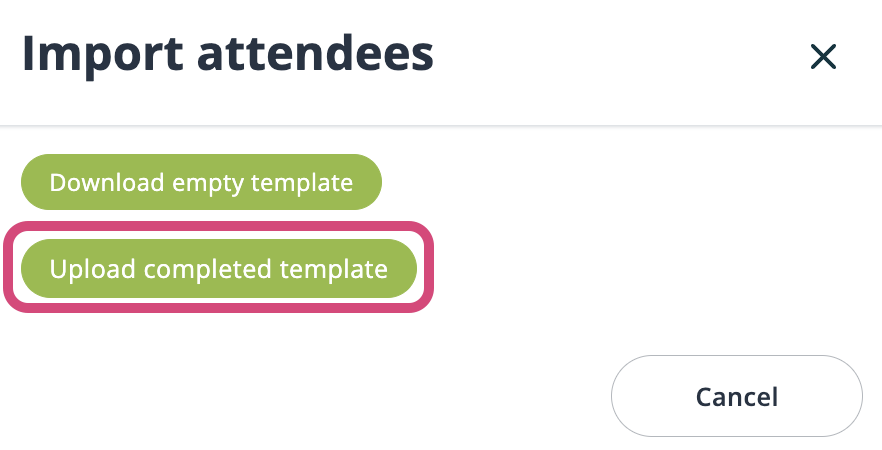
The attendees that were part of your files have now been imported to your event and have been allocated your default registration status.
4. Rules for an Attendee List Import
When importing data, it's essential to follow a standard procedure. Initially, download the template, as it plays a crucial role in enabling the system to identify and process the imported information. Any modifications to the template's structure may result in significant consequences for the successful completion of the request. After obtaining the template, proceed to populate it with the necessary information.
- File type - must be XLSX
- Email address - a valid entry must include both an "@" symbol and a period (".") following it, like: "example@idloom.com". The email field is mandatory when importing a file.
- Category - in the "Registration category" column, please specify the precise name of your category, and in the "Category quantity" column, provide the corresponding quantity.
- Option - in the column labeled with the option's name, you will find the option details. To include an option for a participant, indicate the required quantity (0, 1, or more) in the cell.
- Free text field - no specific information is anticipated, and there are no restrictions on your input, such as for fields like First Name and Last Name.
- Choice list – need to indicate the exact same entry as the choices from the registration form.
- Country field - must use ISO 3166-1 alpha-2 codes.
- Language of the registration - must use ISO 639-1 alpha-2 codes.
- Dates - must use yyyy-mm-dd format and cell must be TEXT type.
- Checkbox - field must have 0 or 1 as value, use either "0" to indicate it's unchecked or "1" to indicate it's checked.
For your information, you do not have to fill in all the fields. If you leave a field blank, it will be considered as a 0 or no entry field, therefore, no information will be imported for this field.
5. Import Notification Email
When importing attendees, you will always receive notification emails. There are two types of notifications, the import complete and the import failed emails.
You will encounter three distinct templates for notification emails:
-
Import Complete - 0 Attendees Imported nor Updated
- You will receive this notification when there is no entry for the provided email address, preventing the system from importing information from the file.
-
Import Complete - X Attendee Imported and X Updated
- This notification is triggered upon importing your file. New email addresses that are not yet associated with your event will be part of the "Imported" number of Attendees.
- Existing email addresses, resulting in an update to the respective contact in the event will be part of the "Updated" number of Attendees.
-
Import Failed - Description of the Error
- This notification is sent if, for any reason, your import cannot proceed. Typically, this occurs when the file's structure does not align with the template. The notification will always include a description of the error or the line on which the error is located.
To Conclude
These import and export features offered by idloom contribute to a more efficient and organized event planning process. They enable event organizers to manage data seamlessly, analyze event performance, and communicate effectively with attendees, speakers, sponsors, and other stakeholders.
Congratulations! You are now fully equipped to harness the power of idloom's import and export feature, streamlining your event management process. Should you encounter any challenges or have inquiries, our dedicated support team stands ready to provide assistance and guidance.
Embrace and make the most of your upgraded event management capabilities!
The idloom.events team
